Generate AVETMISS exports
Use the 4-step Export Wizard to build, validate, and download your AVETMISS NAT files.
Purpose
Generate a complete and validated AVETMISS export covering student, enrolment, course, and unit activity data for submission to your state training authority.
When to use
At the end of a reporting period, when preparing a submission to your state training authority (NCVER or equivalent), or when your compliance team requests an export.
Steps
- 1In the left sidebar, go to Compliance and click AVETMISS Exports.
- 2Click the Create Export button (top-right). The 4-step Export Wizard opens.
- 3Step 1 — Select Date Range: Enter a Start Date and End Date covering the reporting period. Dates cannot be in the future.
- 4Step 2 — Configure Options: Choose whether to Include Withdrawn Students in the export, and add any notes for your records.
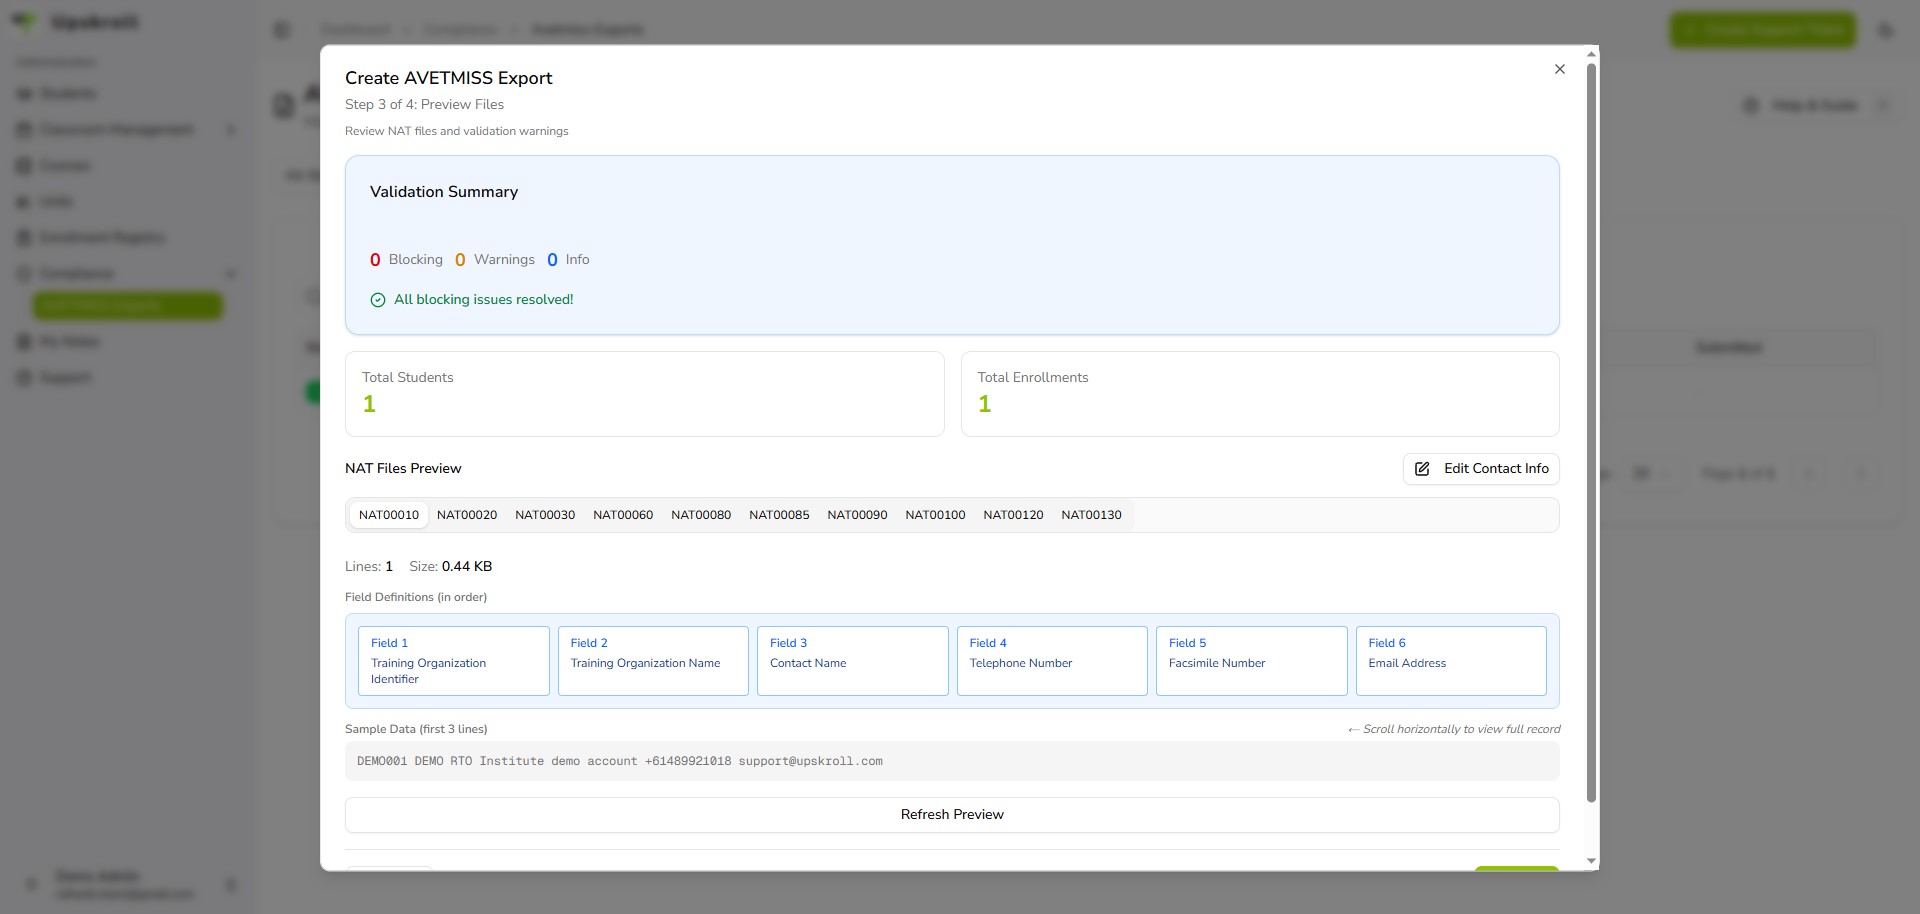
- 5Step 3 — Preview Files: Upskroll shows you a summary of the data: total students, enrolments, and a tabbed preview of each NAT file (NAT00010 through NAT00130). Review the Validation Summary card — it shows Blocking errors, Warnings, and Info items. Blocking errors must be resolved before the export can proceed. Inline fix links (e.g. Edit Contact Info, View and Fix Demographics) take you directly to the affected records.
- 6If blocking errors are present, follow the inline fix links to correct the data, then return and re-run the preview.
- 7Step 4 — Confirm and Create: Once validation passes, review the summary and click Create Export Job. The export is queued and processed.
- 8When the export status shows Completed, download the NAT files from the export record.
What happens next
- A complete set of AVETMISS NAT files is generated covering the selected date range.
- Files include NAT00010 (RTO), NAT00020 (delivery locations), NAT00030 (courses), NAT00080 (students), NAT00100 (enrolments), NAT00120 (unit activity), and others.
- The export appears in the AVETMISS Exports list with a Completed status badge.
- You can mark the export as Submitted once it has been lodged with your state training authority.
Tips
- Run exports on a regular cycle (monthly or at the end of each reporting period) rather than waiting until a deadline — this surfaces data issues early.
- Do not ignore Warnings in Step 3 even if they do not block the export — they indicate data quality issues that may be flagged during regulatory review.
- Use the inline fix links in Step 3 rather than opening tabs manually — they navigate directly to the affected records.
- After marking an export as Submitted, keep it in the Exports list as an audit record. The Submitted Only toggle filters the view to your lodged exports.